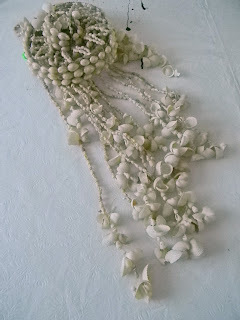
I loved that it had a ton of shells and thought it would be a great start to make a seashell mirror. It was only $1.95 so I bought it. As for the mirror, I could buy a new one but since I believe in reusing what I already own I decided to use one I purchased at the thrift store several years ago for about $12.
Before I began I painted the frame white. I didn't want the wood showing through if I missed a spot and the white paint would help disguise it. I also separated the shells in different sizes to see how much of each size I actually had to work with. I started laying out the pieces on the mirror to see what kind of pattern I wanted. I felt it should look random but needed to be organized.
I could see I did not have enough so I bought a few more bags from the dollar store.
The first step was to glue the smallest shells along the inside rim with my hot glue gun. I then followed with another row of slightly larger shells. So far so good.
I then glued the larger shells all around the front part of the frame. Before I glued any of the shells down I laid them out to make sure I had enough and made any necessary adjustments. I'm about halfway finished and here is how it looks now.
I had to stop here because...well...I ran out of glue sticks. Anyway, my next step is to buy more glue and fill in all the gaps with more shells. Stay tuned for part 2.
I had to stop here because...well...I ran out of glue sticks. Anyway, my next step is to buy more glue and fill in all the gaps with more shells. Stay tuned for part 2.
B.


0 comments:
Post a Comment