2

Showing posts with label Redo. Show all posts

Monday, February 5, 2018

Thrifty Find: More Cabinets

Sometimes I wish I had a larger home or at least more storage space in my house. On my weekly trip to the thrift store I ran across these beauties. I'm not sure what's gotten in to the Habitat Restore but lately they have been jam packed with some beautiful, high quality solidly built furniture. A lot of them show very little wear and tear. 

I first spotted this dresser. I am not crazy about some of the embellishments but it is still quite lovely. I could paint it a color like red or navy or even your basic white or black. I'd either remove the stars or leave them gold. The lines are great but the best thing was that it was solidly built. Oh and the price was only $10. 
I also spotted two small chests. They were about 30" wide and 36" tall. I'm sure they were once a part of a bedroom wall unit that was dismantled and for sure they are not in good shape. A little sanding, a good coat of paint and new hardware and these would make outstanding nightstands. By the way, they were only $1.00. Seriously. I may have to rethink not taking them and see if they are still available. Buy them, paint them and sell them. It would surely be worth the effort and money.
My favorite find of all is this mid century modern cabinet. OMG. I fell in love with this piece the moment I saw it. It is solid wood, has clean lines and is in near perfect condition. It's about 5 ft wide and would make a perfect TV cabinet. I still have the same problem in that I have no where to put it. I may have to find a spot for it though because one should not pass up a deal like this. Oh did I mention that it's only $10 too. I'm thinking of going back to see if it is still there. With my luck it and the nightstands are probably gone. 

Man I wish I had a big house.

Cheers,

Barbara

Monday, January 15, 2018

Freshen Up the Kitchen on a Tiny Budget

It's time to freshen up my kitchen. It's not a bad kitchen just kind of ordinary. It's a little scuzzy like most kitchens I imagine so it could use a really good cleaning. I was going to move a couple of years ago and wanted the kitchen to be pretty neutral so I painted the walls this warm gray which honestly I am quite happy with. I don't want to start replacing counter tops and moving walls. It just needs a little pick me up to make it more cheery. 


I have a tendency to get bored with colors after a while and don't want to have to paint my kitchen repeatedly so I am going to leave the walls neutral. I want new curtains, dish towels, accessories, a piece of art or a clock for the only large wall in the room. 

The storage closet still has the original door and it is in good shape but that dark wood has got to go. Since it is a special size it will be cheaper to paint than to buy new so I'll paint it and replace the knob. I think I may replace the paneling on this large wall and possibly replace the ceiling fan.


Also I have to show you this issue. Oh my goodness I am so embarrassed. I've tiled my kitchen twice in my 17 years here and each time this happens because of a sag in the floor. 


We've tried shoring up the floor underneath the house and putting thick plywood down before tiling and it's not working. I finally remembered that when I bought the house the kitchen had sheet vinyl and that was why the floor tile breaking up was not a problem. I don't want to take the chance of this happening again so what I want to do is put vinyl tile down. Vinyl has come such a long way that I think it can be quite beautiful with a lot less trouble. It's an expense I am not ready to have right now so for the time being good old area rugs will do.

I have long term plans for the kitchen as well that I may tackle next year. I'd love new counter tops as this Corian counter gets so dingy and is hard to clean. Also I hate this half sink and would love to have more counter space. My kitchen is too small for an island but I am hoping I can get a peninsula.


They last thing to look at and something I need help with is this kitchen table. It is a solid wood oak table that is one of my favorite thrift store finds but as you can see the color is way wrong. It needs to be updated to match the room which means either paint or stain. 


My other option is to use my moms old table which i absolutely love.


Mom and I use to sit around it looking at all the different shaped stones to see what we could find that resembled something else like a fish or a dog. The top is resin so it's super durable and has lasted for at least 40 years. The only thing it needs is a touch up on the legs which will be simple to do. Other than that it is in perfect shape. I cannot decide whether to keep the stone table or stain the wood one. Either way I am keeping the stone table until I can find another use for it. The wooden table is not so easy to store away so it's use it or lose it. 

So that's the plan. I don't want to spend more than a few hundred dollars so I have to be frugal and shop at home first and then look for some deals. Time to get a move on.

Cheers!.

B.

Monday, February 17, 2014

Another lamp update

I know I've said it before, but I have a sad lamp obsession. Truly, I seldom see a lamp that I hate because I know most flaws can be resolved with a good coat of paint. My favorites are crystal lamps but really, it doesn't matter. I found these two lamps at a thrift store and fell in love with the the gray glass and the shape of the wooden body. They are in sad shape but at $8 it's worth taking a stab at repairing and updating. 
Over the next couple of months I will take on that project but for now I'll update a pair I already own. These two buffet lamps are just dull and dark to me. I really want to lighten them up. 
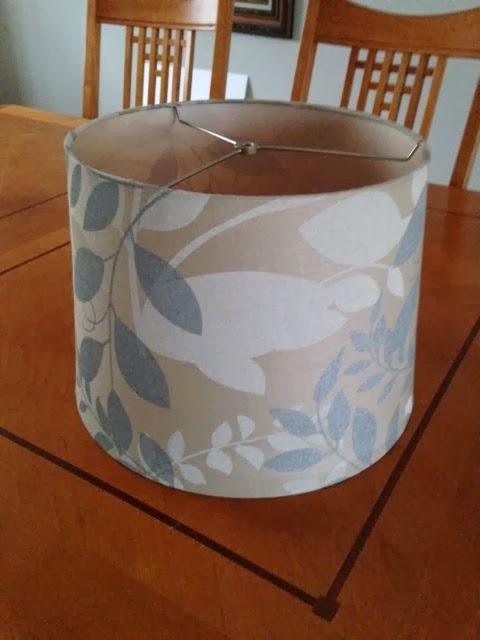
I found a can of Krylon metallic paint in Caramel Latte on clearance and thought it would go pretty well with the lampshades I already owned. I didn't have the shade with me so had to guess at the color. I guessed well because the color is bang on. 
This project was really fairly easy. As always I sprayed the lamps with a coat of primer, let them dry for an hour and then applied two coats of paint allowing the coats to dry completely in between. The next day I followed up with a coat of sealer and let them dry for a couple of days before touching them to avoid finger prints. 
I reattached the lampshade and in just a few short hours on the weekend I've got a set of updated buffet lamps that look better than new. 
If you have a lamp you've updated please send me a picture. I'd love to see them.

Barbara

Monday, January 20, 2014

Thrift Store Tables

I have been on the hunt for end tables for my living room the longest time. As always the question was should I buy new or used. I decided to buy used but for the life of me could not find the right tables. I shop thrift stores a lot but often it is difficult to find two matching tables. I didn't want the end tables to match the coffee table, but if there are too many different styles of tables it can make everything look cheap. My living room is small and I feel balance is important in a small space. This means I need matching tables and had to be patient. After several months of patience, I couldn't wait any more so I started to shop, and shop, and shop. Nothing. Then I went on line and I saw these options. 
Overstock.com
Wayfair
I liked the size and color and all the detail made them interesting. I was almost ready to buy but thought I'd make one more trip to the thrift store. I was hoping to get lucky and finally I was. I found this matching set of solid wood end tables by Lane Furniture for $40 a piece. This is a little more than I would want to pay for thrift store finds, but I could see these were really good tables.  I talked to the manager to see if I could get a better deal and he agreed to sell them to me for $30 each.


They were a little beat up and had this ugly yellow top but I loved the scalloped details on the base, the fluted legs and the turned feet. The only thing I did not like was the size. I preferred about 18" to 20" square or round and about 22" high. These were 24" high and 22" square so before I bought I weighed the pros and cons. Pros: Solid wood, well built, nice details with two shelves and $30.  Cons: They are too tall, too wide and I don't like the color especially the top. These are solid wood end tables for what is likely to be a fraction of their original price so pros win. 
Now I have to decide what to do with them. They look like tables you'd find in a banker's office and that is definitely not the look I am going for. I can leave them as is, paint them or white wash but what ever it is I do, that top has got to go.

Stay tuned.

Monday, October 15, 2012

Nightstand Redo Completed

Last week I started re-doing a couple of nightstands that I picked up at the Habitat Restore. I got them for my bedroom because what I had was way too small. I took a couple of old tables and replaced them, but they were too big. At the risk of sounding like Mama Bear, these were just right. One problem, they were badly damaged from cigarette marks. It was nothing that I knew a few coats of paint wouldn't fix. Here is the before picture...
and after....
Remember the damaged top..
and with a little paint....
The hardware was kind of scuzzy so I cleaned them up with a little tarnish remover. Here is the before...
 ....and after.
The one battle I had was deciding whether to keep or replace the hardware. My original thought was to replace them so before I primed I filled in all the holes with wood filler. As I was searching for new hardware I realized a few things. First, each nightstand had six handles so I would have to buy either 6 or 12 new handles which would cost as much as the stands them selves. Second, when I started looking at used, everything I looked at was similar to what was already there. Last, I have a bench and picture frame that are similar to the gold on the nightstand hardware so they already fit in well with the decor of the room. I wasn't planning on redoing my bedroom, just spiffing it up a bit. This means minimal cash. For all of these reasons I decided to stick with the original hardware for now.
Ultimately I want glass, acrylic or crystal handles. I want them at the right price so I am willing to wait.

On to the next project.

Monday, October 8, 2012

Old Furniture Gets a Facelift

The weather is getting colder in Chicago so it's about time I wrapped up some of my spray painting projects. Pretty soon it will be too cold to spray paint and since that is how I choose to redo my furniture most of the time I had better get a move on. I bought these nightstands at the Habitat Restore a few months ago. I liked them because they were solid wood, had a good size top and since they had three drawers each they would provide plenty of storage. 

One of them had a lot of cigarette burns on the top. I knew it was repairable so I bought them anyway.
I began by using wood filler to fill in the cigarette marks and the holes from where I removed the hardware. 

Once dried I gave the nightstands and drawers a good sanding. I then wiped down all the surfaces with a damp cloth to remove all the dust.

I then sprayed all of the drawers and nightstands with Rustoleum's spray paint primer. 


I let it dry for a couple of hours and followed with two coats of spray paint in Rustoleum's Heirloom White. Quick tip: If you are painting furniture that is down on the ground you have to get down there with it. There will be spots which you may not see if you are standing above but you will if you are sitting on the floor. 


After they dried I took a step back and decided to add another coat. I generally spray two coats but it looked a little splotchy so another coat was needed. Another tip when spray painting is to move the can back and forth across the surface in an even steady pace. If you rest too long in one spot the paint will drip and puddle. After allowing it to dry thoroughly I finished with a top coat of clear glossy paint. It took two days and here is how they look now.

It's important to allow paint to cure or harden so after painting I do not touch them for several days. It may feel dry to the touch but it you pick it up, you will leave behind fingerprints. My next step is to add the hardware. When I repaired the top I also filled in the holes on the drawers because I thought about replacing the handles with something more contemporary. I'm starting to second guess this decision because there are six handles per nightstand so if I keep the same holes I would need 12 new handles.That would cost as much as the nightstands. I also thought about using one handle per drawer but that might take away from some of the character. I've haven't decided what to do yet but stay tuned to find out.  

Monday, September 24, 2012

Painted tray

I love the look of painted trays almost as much as I like woven baskets. They are the coolest way to keep things neat and organized and add a bit of style to boot. They are fun to use on a table or ottoman and are great to hold bills or papers on a desk. They come in a multitude of colors, shapes, sizes and styles but if you are into making things your own you can find a plain one at a thrift or discount store that you can then paint or embellish to suit your own personal style. 

I found this tray tucked way in the back on the bottom shelf at my local Homegoods store. It was a bit beat up but for $7 I didn't care. All of the scratches would be covered up anyway with a couple coats of spray paint. I've painted a tray before a bright red but this time I wanted to go a bit more neutral so I could use it in multiple rooms. 


This was a very simple project, but to start I roughed up the surface a bit with a piece of sandpaper so that it would accept the primer. I followed with a couple of coats of Rustoleum's Painters Choice spray paint in Dark Gray.  


 I decided I wanted the inside to be ivory so I taped of the top edges and along the handle side so that the ivory paint would not seep through. I wanted the inside of the handle to be ivory so that you could see it from the outside of the tray and it would look like an accent. I followed up with a couple of coats of gloss top coat to protect it.


Here is the final tray.


Wednesday, September 12, 2012

Time to Redo the Living Room

I had planned to make the living room one of the last rooms I did in the house but I feel I can't wait that long. It's the first room you and your guests see when entering your home and it should be the most inviting. Since the day I moved in I have been decorating almost every room with autumn shades like rust, brown, amber and beige. I eventually realized that I had allowed the color of my red oak dining room set to dictate the color of my living and dining rooms because I kept trying to match it. No more. The last few years I've started to get a little bored with it and thought about a space that's more relaxing and softer. I fell in love with the rooms featured at this post about gray rooms because they represent the feeling of what I want to bring to my living room. I want to lighten it up and make it more airy almost coastal. I'll call it urban coastal. Now I am not one for fancy decorator talk but what I am trying to describe is a space that is light and airy with hits of warm accents. Here is my living room as it is today...


   and this is the direction I want to go in....

                         1.                                        2.                               3.
     4.                                                                                                              5.                                  6.
1. Overstock.com
2. Fabric.com
3. Fabric.com
4. Lumber Liquidators
5. Fabric.com
6. Target


I'm sure I will switch out the fabrics and paint chips until I settle on something definite. I also want to reuse as much of what I already own so I will not buy much if any new furniture. My dining table and hutch has a red oak finish and I have a couple of end tables that have a similar finish. I also have an ivory table that I want to change up a bit. The big  change will be replacing the carpet. I am way to embarrassed to show you how dirty it is, but I've given up on carpet for my living room and have opted to go with hardwood. I really wanted a darker walnut finish but because Roxie, my blond haired Pug, sheds so much I fear I would constantly chase little balls of dog hair because they would be much more visible on the dark floor. Who has energy for that so light wood is the way to go. 

My goal is to take this palette and build on it doing as much as I can myself, reuse most of what I already own and for what I don't own, hunt for bargains. Like I always say, free or next to nothing is my price range. This is just the beginning and who knows where I'll end up. 

Monday, June 4, 2012

A Steal for the Bathroom

For the last several months I have been debating whether or not to get a new vanity for the downstairs bathroom. I finally decided to keep the vanity but the jury was still out on whether or not to replace the countertop. 

It currently has a gray Corian top with an ivory bowl and a dingy old single handle faucet both of which have seen better days. I could replace the faucet, definitely, and replace the sink, maybe, but the countertop is in good shape and went with the overall color scheme. What I really wanted was natural stone, preferably granite but I couldn’t find what I wanted that fit within my price range which was between $0 and next to nothing. That was all resolved when over the weekend I found this beauty at Habitat Restore.


It is a six foot long white marble top with light gray veining, an ogee edge, cut outs to accommodate an  undermount sink and widespread faucet and I got for a steal at just $35. Can you believe it!!?? SCORE!!! I paid for it right then and there and called my contractor to help me pick it up. A piece like this might normally sell for about $500 so I could not walk away from such a good deal.


The existing vanity counter top is about 32" inches wide with an off center sink because there are drawers on the left side. After we cut the marble to fit the vanity there will be enough left over to use for another application. Not sure what I'll do with it but I can worry about that another day. I can't wait to see it in. 

Monday, May 21, 2012

Yellow is Mellow

I’ve decided to paint my laundry room yellow. I love this sunny bright color and the way it livens up any room. Finding the right one proved to be a challenge. Just ask my son who partially painted it three times because the color was too lemony or too camel or even too peach. I finally settled on a medium yellow tone that is not too lemony but still bright and sunny. The color changed at different times of day and looked dramatically different from wall to wall so I had to sit with it a couple of days to get used to it. I am happy with what I chose much to my sons delight or should I say relief. I've only partially painted two walls so I don't have any pictures to share with you but I will soon. If you are thinking of painting a room in your home yellow, here are some photos that may inspire you.

Better Homes and Garden


Better Homes and Garden 2012


Elle Decor


Elle Decor


Emily Henderson HGTV


House Beautiful March 2012

Velvet Hammerschmidt HGTV

Metropolitan Home


BLOG DESIGN © 2012 SMITTEN BLOG DESIGNS/ CONTENT © 2012 MY HOME IN THE HEIGHTS