2

Showing posts with label Painting. Show all posts

Monday, February 17, 2014

Another lamp update

I know I've said it before, but I have a sad lamp obsession. Truly, I seldom see a lamp that I hate because I know most flaws can be resolved with a good coat of paint. My favorites are crystal lamps but really, it doesn't matter. I found these two lamps at a thrift store and fell in love with the the gray glass and the shape of the wooden body. They are in sad shape but at $8 it's worth taking a stab at repairing and updating. 
Over the next couple of months I will take on that project but for now I'll update a pair I already own. These two buffet lamps are just dull and dark to me. I really want to lighten them up. 
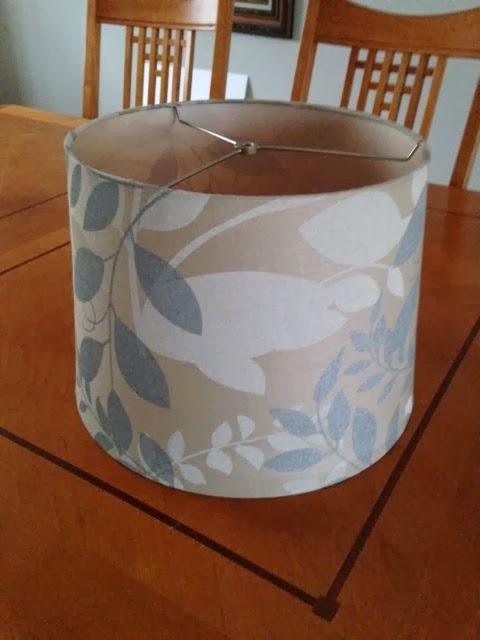
I found a can of Krylon metallic paint in Caramel Latte on clearance and thought it would go pretty well with the lampshades I already owned. I didn't have the shade with me so had to guess at the color. I guessed well because the color is bang on. 
This project was really fairly easy. As always I sprayed the lamps with a coat of primer, let them dry for an hour and then applied two coats of paint allowing the coats to dry completely in between. The next day I followed up with a coat of sealer and let them dry for a couple of days before touching them to avoid finger prints. 
I reattached the lampshade and in just a few short hours on the weekend I've got a set of updated buffet lamps that look better than new. 
If you have a lamp you've updated please send me a picture. I'd love to see them.

Barbara

Monday, January 27, 2014

Painted Thrift Store Tables

Last week I blogged about my thrift store end tables. They are beautiful solid wood tables but I really did not want brown tables because I have so much brown already in my living room. I have always loved the look of white tables and decided to paint them white. 
These were my inspiration tables... 
And this is what my tables look like now...

I have to say these were extremely difficult to paint and if I had it to do over again I might have done things differently. I began painting them with spray paint but because there are three flat surfaces, a four sided scalloped based and fluted legs this job was crying out for a paint sprayer.  
Spray paint cans was not a good choice because it would have required many cans to prime, paint and seal both tables. The amount I saved on buying used instead of new would have been wasted. I didn't have a paint sprayer and wasn't ready to invest in one so I opted to paint them by hand. 
I gave the wood a good sanding before priming. The yellow tops were vinyl so I don't know how much the sanding helped. I had glass tops so I wasn't too concerned about the paint not covering well. I used a sponge paint roller for the three flat surfaces and a bristle brush for the legs and base. There are a lot of nooks and crannies so paint tended to puddle in places. I took my time to make sure the wood was covered and did not put too much paint on the brush. If there is anything I learned it's that you have to get down low when you paint furniture like this. If not you will easily miss spots. You my not notice if you are standing up but if you are ever sitting on the floor the missed spots will be visible. 
I used two coats of primer, two coats of paint and two coats of water based sealer. It took a few weeks to finish both tables because I wanted them to dry thoroughly between coats. The  most important step was to let the paint cure or harden so when I was finished I didn't touch or move them for a week.     
These were easily the most difficult paint project I've ever had. I thought they turned out beautifully and I am very happy with them.

Monday, January 20, 2014

Thrift Store Tables

I have been on the hunt for end tables for my living room the longest time. As always the question was should I buy new or used. I decided to buy used but for the life of me could not find the right tables. I shop thrift stores a lot but often it is difficult to find two matching tables. I didn't want the end tables to match the coffee table, but if there are too many different styles of tables it can make everything look cheap. My living room is small and I feel balance is important in a small space. This means I need matching tables and had to be patient. After several months of patience, I couldn't wait any more so I started to shop, and shop, and shop. Nothing. Then I went on line and I saw these options. 
Overstock.com
Wayfair
I liked the size and color and all the detail made them interesting. I was almost ready to buy but thought I'd make one more trip to the thrift store. I was hoping to get lucky and finally I was. I found this matching set of solid wood end tables by Lane Furniture for $40 a piece. This is a little more than I would want to pay for thrift store finds, but I could see these were really good tables.  I talked to the manager to see if I could get a better deal and he agreed to sell them to me for $30 each.


They were a little beat up and had this ugly yellow top but I loved the scalloped details on the base, the fluted legs and the turned feet. The only thing I did not like was the size. I preferred about 18" to 20" square or round and about 22" high. These were 24" high and 22" square so before I bought I weighed the pros and cons. Pros: Solid wood, well built, nice details with two shelves and $30.  Cons: They are too tall, too wide and I don't like the color especially the top. These are solid wood end tables for what is likely to be a fraction of their original price so pros win. 
Now I have to decide what to do with them. They look like tables you'd find in a banker's office and that is definitely not the look I am going for. I can leave them as is, paint them or white wash but what ever it is I do, that top has got to go.

Stay tuned.

Monday, January 13, 2014

Vase Redo

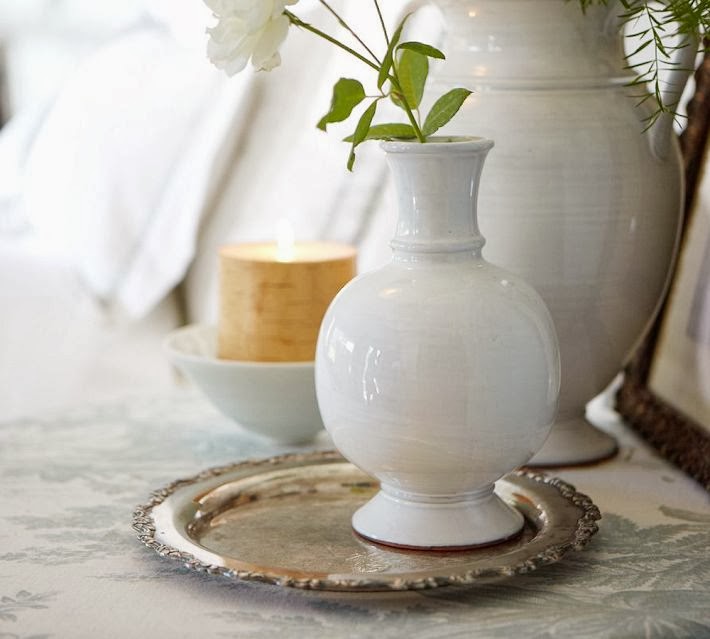
I love a simple classic white vase. It comes in such a wide variety of shapes and sizes and I really love the textured vases you often see in stores and DIY blogs. I shopped on line and decided why spend $50 bucks for a new one when I can take something I already own and update it. 
 Pottery Barn
Pottery Barn
I have had this red vase for about ten years. It's a good size and shape but I am bored with the color. A quick update with a coat of white paint will do the trick. 
Before painting I had to rough it up a bit with sand paper because it has a glossy finish. As always, I then added a coat of primer. If I don't prime, I don't paint. Your finish coat will just scratch off.
I couldn't decide if I wanted a creamy white or a pure white but opted for the pure white.
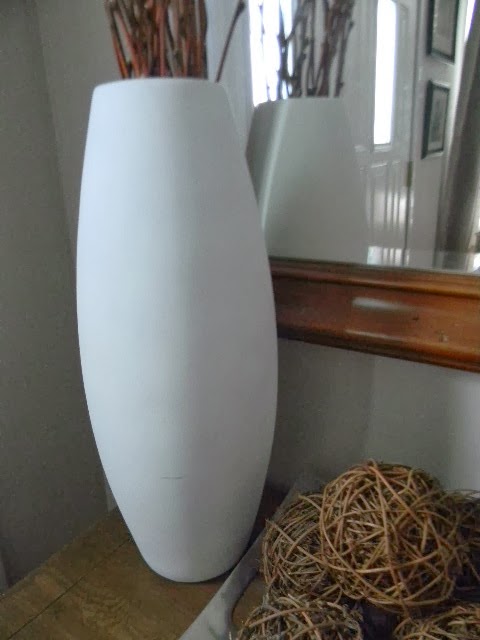
 I have to tell you that when the primer dried it looked so good I decided to paint it a matte white instead of the gloss.
I put two coats of matte spray paint and a coat of matte sealer and I was good to go.
 
Cost of updating a an old vase? $3 for the primer and $3 for the paint. Good deal.
I like this much better.

Monday, October 15, 2012

Nightstand Redo Completed

Last week I started re-doing a couple of nightstands that I picked up at the Habitat Restore. I got them for my bedroom because what I had was way too small. I took a couple of old tables and replaced them, but they were too big. At the risk of sounding like Mama Bear, these were just right. One problem, they were badly damaged from cigarette marks. It was nothing that I knew a few coats of paint wouldn't fix. Here is the before picture...
and after....
Remember the damaged top..
and with a little paint....
The hardware was kind of scuzzy so I cleaned them up with a little tarnish remover. Here is the before...
 ....and after.
The one battle I had was deciding whether to keep or replace the hardware. My original thought was to replace them so before I primed I filled in all the holes with wood filler. As I was searching for new hardware I realized a few things. First, each nightstand had six handles so I would have to buy either 6 or 12 new handles which would cost as much as the stands them selves. Second, when I started looking at used, everything I looked at was similar to what was already there. Last, I have a bench and picture frame that are similar to the gold on the nightstand hardware so they already fit in well with the decor of the room. I wasn't planning on redoing my bedroom, just spiffing it up a bit. This means minimal cash. For all of these reasons I decided to stick with the original hardware for now.
Ultimately I want glass, acrylic or crystal handles. I want them at the right price so I am willing to wait.

On to the next project.

Monday, October 8, 2012

Old Furniture Gets a Facelift

The weather is getting colder in Chicago so it's about time I wrapped up some of my spray painting projects. Pretty soon it will be too cold to spray paint and since that is how I choose to redo my furniture most of the time I had better get a move on. I bought these nightstands at the Habitat Restore a few months ago. I liked them because they were solid wood, had a good size top and since they had three drawers each they would provide plenty of storage. 

One of them had a lot of cigarette burns on the top. I knew it was repairable so I bought them anyway.
I began by using wood filler to fill in the cigarette marks and the holes from where I removed the hardware. 

Once dried I gave the nightstands and drawers a good sanding. I then wiped down all the surfaces with a damp cloth to remove all the dust.

I then sprayed all of the drawers and nightstands with Rustoleum's spray paint primer. 


I let it dry for a couple of hours and followed with two coats of spray paint in Rustoleum's Heirloom White. Quick tip: If you are painting furniture that is down on the ground you have to get down there with it. There will be spots which you may not see if you are standing above but you will if you are sitting on the floor. 


After they dried I took a step back and decided to add another coat. I generally spray two coats but it looked a little splotchy so another coat was needed. Another tip when spray painting is to move the can back and forth across the surface in an even steady pace. If you rest too long in one spot the paint will drip and puddle. After allowing it to dry thoroughly I finished with a top coat of clear glossy paint. It took two days and here is how they look now.

It's important to allow paint to cure or harden so after painting I do not touch them for several days. It may feel dry to the touch but it you pick it up, you will leave behind fingerprints. My next step is to add the hardware. When I repaired the top I also filled in the holes on the drawers because I thought about replacing the handles with something more contemporary. I'm starting to second guess this decision because there are six handles per nightstand so if I keep the same holes I would need 12 new handles.That would cost as much as the nightstands. I also thought about using one handle per drawer but that might take away from some of the character. I've haven't decided what to do yet but stay tuned to find out.  

Monday, September 24, 2012

Painted tray

I love the look of painted trays almost as much as I like woven baskets. They are the coolest way to keep things neat and organized and add a bit of style to boot. They are fun to use on a table or ottoman and are great to hold bills or papers on a desk. They come in a multitude of colors, shapes, sizes and styles but if you are into making things your own you can find a plain one at a thrift or discount store that you can then paint or embellish to suit your own personal style. 

I found this tray tucked way in the back on the bottom shelf at my local Homegoods store. It was a bit beat up but for $7 I didn't care. All of the scratches would be covered up anyway with a couple coats of spray paint. I've painted a tray before a bright red but this time I wanted to go a bit more neutral so I could use it in multiple rooms. 


This was a very simple project, but to start I roughed up the surface a bit with a piece of sandpaper so that it would accept the primer. I followed with a couple of coats of Rustoleum's Painters Choice spray paint in Dark Gray.  


 I decided I wanted the inside to be ivory so I taped of the top edges and along the handle side so that the ivory paint would not seep through. I wanted the inside of the handle to be ivory so that you could see it from the outside of the tray and it would look like an accent. I followed up with a couple of coats of gloss top coat to protect it.


Here is the final tray.


Tuesday, September 4, 2012

Painting The White Door White


"Say What"? That is probably what you are thinking but let me explain. The cabinet doors for my bathroom had these silly little square pieces of Corian in the corners. The color matched the decor but when I removed the Corian countertop it didn't make sense to keep the chips any more so I removed them. I always thought they looked like a cheesy afterthought anyway. Unfortunately they didn't peel off easily and since the door is not wood it just took the top layer of the paper off. 


No biggie and nothing that a little drywall compound can't fix. 


To start I took the doors of the hinges and laid them flat so they would be easier to work with. I removed all the hardware and cleaned the doors with a little soap and water. 


Next I used a scraper to spread the compound in the corners and smoothed it out. It wasn't necessary to do the whole door. If you want you can also use spackle. The idea is to make it an even surface otherwise no matter how much you paint you are always going to see where the paper peeled.  


 After letting it dry for 24 hours I sanded it down so it was nice and even.


 Whether you are working with drywall compound or spackle, let it dry thoroughly before trying to sand it. After sanding and before painting use a cloth or an old sock to wipe off all the dust.


Next I sprayed the doors with white spray primer and two coats of white paint letting the paint dry thoroughly between coats. One tip: Let the doors dry for a full day so it has time to harden. The paint may be dry to the touch but if you pick up the door it will leave fingerprints and then it's back to the drawing board. 


Last step is to replace the hardware. The pulls on these cabinet doors are made of nickel and are  very heavy. I thought about replacing them with something more plain and streamlined but for now these are more than fine. 


That's all there was to it. This looks so much better don't you think.


To be honest I was a little concerned after I ripped off the Corian chips. I thought about replacing the doors but this worked out fine and I'm very happy with how they turned out. 
 
BLOG DESIGN © 2012 SMITTEN BLOG DESIGNS/ CONTENT © 2012 MY HOME IN THE HEIGHTS